
Key Takeaways:
- Instagram Reels are the highest-reach content format on the platform in 2026
- Optimal specs: 1080 x 1920 pixels, 9:16 aspect ratio, up to 3 minutes
- Shorter Reels (15-30 seconds) typically outperform longer ones for retention
- TikTok content can be repurposed as Reels (just remove watermarks)
- The algorithm prioritizes watch time, shares, and saves over likes
- Posting 3-5 Reels weekly is enough to see consistent growth
Instagram Reels have become the main discovery engine on the platform. If you want new followers in 2026, Reels are how you get them.
This guide covers everything from the basics to algorithm strategy. Whether you're just getting started or looking to improve your results, you'll find what you need here.
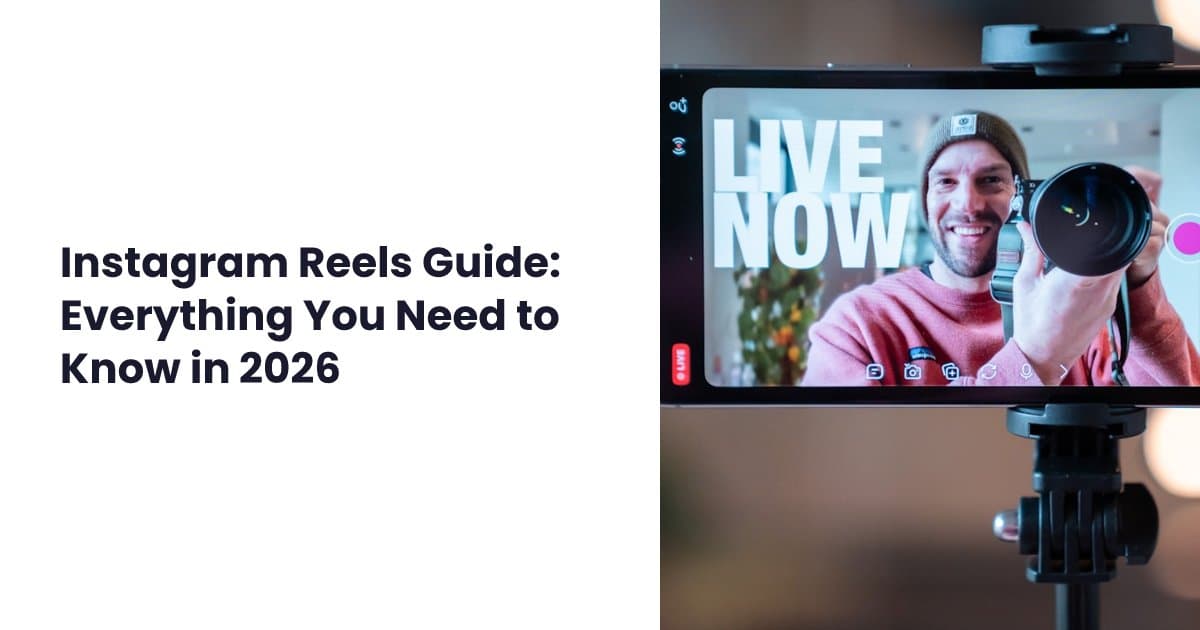
What are Instagram Reels?
Reels are Instagram's short-form video format. They can be up to 3 minutes long and appear in several places: the dedicated Reels tab, the Explore page, your main feed, and your profile grid.
Think of Reels as Instagram's version of TikTok videos. The format is vertical, the editing tools are similar, and the algorithm pushes content to people who don't follow you.
Reels vs Stories: What's the difference?
Stories disappear after 24 hours. Reels stay on your profile permanently (unless you delete them).
Stories are meant for your existing followers. Reels are meant to reach new people. The algorithm behind each is completely different.
| Feature | Reels | Stories |
|---|---|---|
| Duration | Up to 3 minutes | Up to 60 seconds |
| Visibility | Public, discoverable | Followers only (unless highlights) |
| Lifespan | Permanent | 24 hours |
| Primary audience | New viewers | Existing followers |
| Algorithm focus | Discovery | Engagement |
If you want reach, post Reels. If you want to stay top-of-mind with existing followers, post Stories. Most creators do both.
Reels vs TikTok: Key differences
The formats are nearly identical, but the platforms have different vibes:
Content style: TikTok leans more chaotic and trend-driven. Instagram Reels skew slightly more polished, though this gap has narrowed.
Audience demographics: Instagram's user base is older on average. TikTok has more Gen Z users, Instagram has more Millennials.
Algorithm behavior: TikTok's algorithm is more aggressive at pushing unknown creators. Instagram tends to favor accounts with existing engagement history.
Editing tools: Both have in-app editing, but TikTok's native tools are more advanced. Many creators edit on TikTok and export to Instagram.
The biggest practical difference: you can repurpose content between both platforms with minimal changes.
How to create Instagram Reels (step-by-step)
Creating a Reel is straightforward. Here's the process from start to publish:
Step 1: Open the Reels camera
Open Instagram and tap the plus icon at the bottom. Select "Reel" from the options. You can also swipe right from your home feed and select Reels from the bottom menu.
Step 2: Record or upload your content
You have two options:
Record directly: Hold the capture button to record. You can record multiple clips and they'll be stitched together. Use the timer feature to record hands-free.
Upload existing video: Tap the gallery icon in the bottom left to upload videos from your camera roll. You can select multiple clips and arrange them.
Step 3: Edit your Reel
After recording or uploading, you'll enter the editing screen. Here's what you can do:
- Trim clips: Tap any clip to adjust its length
- Rearrange: Drag clips to reorder them
- Add audio: Tap "Add audio" to use trending sounds or your own music
- Add text: Tap the text icon to add captions or callouts
- Add stickers: Use polls, questions, and other interactive elements
- Add effects: Apply filters and AR effects
Spend time on the first 1-2 seconds. That's what determines whether people keep watching or scroll past.
Step 4: Write your caption
Keep it scannable. Front-load the most important information. Add a call-to-action if relevant (save this, share with a friend, drop a comment).
Hashtags go here too. Stick to 3-5 relevant ones rather than maxing out.
Step 5: Set your cover and publish
Choose a cover image that looks good on your profile grid. You can select a frame from the video or upload a custom thumbnail.
Hit share. Your Reel goes live immediately (unless you schedule it).
Instagram Reels dimensions and specs
Getting the technical specs right ensures your content looks professional and doesn't get cropped awkwardly.
Required specs
| Spec | Requirement |
|---|---|
| Resolution | 1080 x 1920 pixels |
| Aspect ratio | 9:16 (vertical) |
| Maximum length | 3 minutes |
| File format | MP4 or MOV |
| Frame rate | 30 fps minimum |
Safe zones
The Instagram interface covers parts of your video with UI elements. Keep important content away from:
- Top 250 pixels: Covered by camera controls
- Bottom 420 pixels: Covered by captions, username, and action buttons
- Left and right 35 pixels: May be cropped on some devices
Putting text or key visuals in these areas means they'll be hidden or cut off.
Audio specs
- Use high-quality audio (avoid compression artifacts)
- If using trending sounds, make sure they're still licensed for commercial use
- Original audio often performs well for educational content
- Keep voiceover clear and easy to understand
Best practices for Instagram Reels engagement
Getting views is one thing. Getting engagement that leads to followers is another. Here's what actually works:
Hook viewers in the first second
You have roughly 1 second to convince someone to keep watching. Start with something that creates curiosity:
- A surprising statement
- A question
- Text on screen that promises value
- Movement or visual interest
Avoid slow intros. Don't start with "Hey guys, so today I wanted to talk about..." Get straight to the point.
Optimize for watch time
The algorithm cares most about how long people watch. A 15-second Reel watched to completion beats a 60-second Reel abandoned at the 10-second mark.
Keep it tight. Cut anything that doesn't add value. If your Reel feels slow, it probably is.
Loop your content when possible. If the ending connects to the beginning, people will watch multiple times without realizing it. The algorithm counts this as extended watch time.
Encourage saves and shares
Saves and shares are weighted heavily by the algorithm. They signal that your content has lasting value.
Create content worth saving:
- Tutorials people want to reference later
- Tips they'll need in the future
- Templates or frameworks they can use
- Information they'd want to share with friends
Tell people to save. It sounds obvious, but "Save this for later" actually works.
Post consistently
The algorithm rewards consistent creators. Posting once and disappearing for a month won't get you anywhere.
Aim for 3-5 Reels per week. If that's too much, even 2-3 is fine. The key is maintaining a schedule you can stick with.
Batch your content creation. Filming multiple Reels in one session and scheduling them throughout the week is more sustainable than creating daily.
Use trending audio strategically
Trending sounds can boost discoverability, but they're not required. Instagram has moved toward rewarding original content over trend-hopping.
If you use trending audio:
- Pick sounds that fit your content naturally
- Use them early in the trend cycle
- Add your own twist rather than copying exactly
If you create educational content, original voiceover usually performs better than trending music.
How to repurpose TikTok carousels as Reels
If you're already creating carousel content for TikTok, you're sitting on ready-made Reels content. Carousels (photo slideshows) translate well to both platforms.
Why this works
TikTok carousels and Instagram Reels use the same dimensions (9:16). The content formats are compatible. You're essentially creating for both platforms at once.
Educational carousels perform especially well on Instagram. The audience skews slightly older and more interested in learning compared to TikTok.
How to repurpose
Option 1: Export as video
If you created your TikTok carousel with a tool like PostWaffle, export it as a video file. Upload directly to Instagram Reels. Add a relevant sound if the original audio doesn't fit.
Option 2: Re-upload as Instagram carousel (not a Reel)
Instagram has its own carousel format for static images. Upload your slides as a multi-image post. This isn't technically a Reel, but it's another way to repurpose the content.
Option 3: Screen record with narration
Screen record yourself swiping through the carousel while adding voiceover commentary. This adds a personal touch and often outperforms silent slideshows.
Creating cross-platform carousels
If you want to create carousels that work on both TikTok and Instagram from the start:
- Design at 1080 x 1920 (works for both platforms)
- Keep text within safe zones (both platforms have similar UI overlays)
- Export as both video (for Reels) and images (for Instagram carousel posts)
- Write platform-specific captions
PostWaffle makes this easy by generating carousel content that exports in multiple formats. Design once, publish to both TikTok and Instagram without reformatting.
Instagram Reels algorithm: How it works
Understanding the algorithm helps you create content that gets pushed to more people. Here's what we know about how it works in 2026:
Primary ranking signals
The algorithm weighs these factors when deciding who sees your Reel:
Watch time: How long people watch matters most. Complete views and rewatches signal quality content.
Engagement rate: Likes, comments, shares, and saves relative to views. Shares and saves are weighted more heavily than likes.
User relationship: If someone has engaged with your content before, they're more likely to see future posts.
Content relevance: The algorithm analyzes your video content (not just hashtags) to match it with interested viewers.
How distribution works
Instagram tests your Reel with a small initial audience. If engagement is strong, it expands distribution. If not, reach plateaus.
This happens in waves:
- First 30-60 minutes: Shown to a small test group
- Hours 1-24: If metrics are good, expanded to Explore and more of your followers
- Days 1-7: Continued distribution if engagement stays strong
- Beyond: Evergreen Reels can keep getting views for weeks or months
What hurts your reach
Avoid these algorithm penalties:
- Watermarks from other platforms: Instagram deprioritizes TikTok watermarks
- Low resolution content: Blurry or pixelated videos get limited reach
- Recycled content: Posting the exact same Reel twice rarely works
- Engagement bait: "Comment YES if you agree" type content gets penalized
- Violating community guidelines: Even minor violations can tank your account's reach
What helps your reach
- Original content (not reposted from other accounts)
- Trending audio (when used naturally)
- Strong first-second hooks
- High retention rates
- Consistent posting schedule
Tools for creating Instagram Reels
You don't need expensive equipment or software. Here's what actually helps:
Free options
Instagram's native editor: Good enough for basic Reels. The built-in text, effects, and audio library cover most needs.
CapCut: The best free video editor for short-form content. Available on mobile and desktop. Most creators use this.
Canva: Good for creating text-heavy slides and thumbnails. The video editor is basic but functional.
For carousel-style Reels
If you create educational or informational content, carousel-style Reels (slideshow format) often perform best.
PostWaffle generates carousel content designed for TikTok and Instagram. You can create slides with AI-assisted layouts and export as video files ready for Reels. It's useful if you want to batch-create educational content without manual design work.
Hardware
Phone: Any phone from the last 3-4 years is fine. Modern smartphone cameras produce Reel-quality video.
Lighting: Natural window light or a cheap ring light makes a big difference. Good lighting beats expensive cameras.
Microphone: If you do voiceovers, a $20 lavalier mic improves audio quality noticeably.
Common Instagram Reels mistakes
Avoid these pitfalls that hurt your performance:
Slow hooks
Starting with "So today I want to share..." loses viewers immediately. Get to the point in the first second. The hook determines everything.
Ignoring the safe zones
Text at the bottom of your video will be covered by captions and UI. Preview your Reel before posting to make sure nothing important is hidden.
Posting with watermarks
TikTok watermarks get your reach crushed. Remove them before posting. Use tools like SnapTik or save directly from TikTok's draft before publishing.
Inconsistent posting
Going viral once then disappearing for two weeks wastes momentum. The algorithm favors creators who post regularly. Build a sustainable schedule.
Copying trends without adding value
Jumping on every trend with no original angle makes you forgettable. Either add your unique perspective or skip trends that don't fit your niche.
Over-relying on hashtags
Hashtags help but they're not magic. The algorithm uses visual analysis and engagement patterns more than hashtag matching. Focus on content quality first.
Getting started with Reels
If you're new to Reels, here's a simple plan:
Week 1: Post 3 Reels. Don't overthink quality. Get comfortable with the creation process.
Week 2: Analyze what performed best. Double down on that format.
Week 3-4: Establish a consistent schedule. Aim for 3-5 posts per week.
Month 2 onwards: Experiment with different hooks, formats, and lengths. Use analytics to guide decisions.
The creators who succeed with Reels aren't necessarily the most talented. They're the ones who post consistently and iterate based on results.
Start simple. Improve over time. The algorithm rewards action over perfection.